Create social media cards
Table of contents
After looking at how other people built their personal websites, I noticed that many had cool-looking cards when they’d share links on Twitter.
What are social media cards?
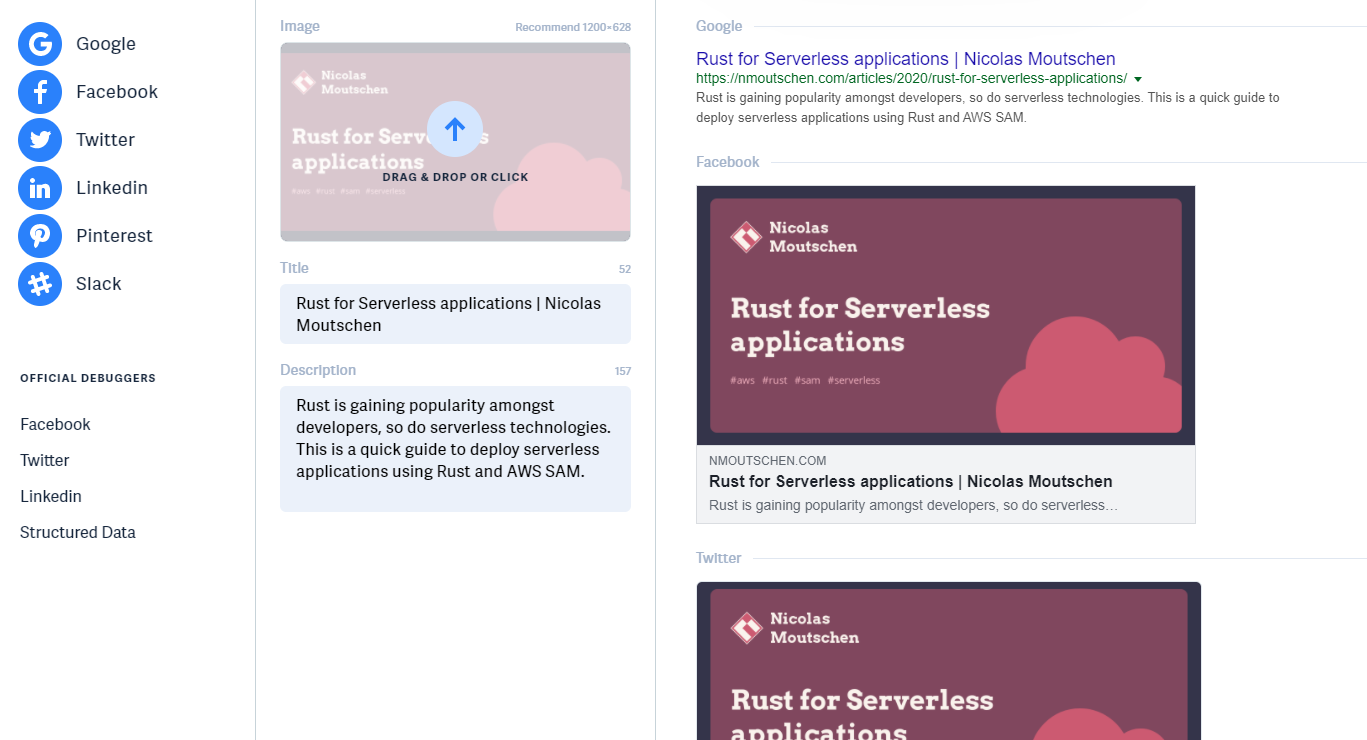
A social media card (also known as social previews) is the link preview you get when you share a link on social media platforms like Facebook or Twitter. They can contain a title, short description and a picture representative of the content. For example, here’s what the social media card for my previous article looks like:

You can define what values should social media platforms use when displaying these cards by defining meta tags in the head section of your HTML document. Since they’re just text, title and description are easy to set, but getting a nice image can be a bit tricky.
The easy part: text properties
There are two main types of metadata you can add to your pages: Open Graph properties and Twitter cards. There is another one called oEmbed, however, it requires serving the metadata on a different address, so this is a bit more complex to set up.
Here are the meta tags you need to add for the title and description:
<!-- You probably have other tags here -->
<!-- For OpenGraph -->
<!-- For Twitter -->
Both use tags with either a property or name starting with og (for Open Graph) or twitter. When you are implementing those for your website, make sure you use the right attributes for each one, as Open Graph uses property while Twitter uses name. I have made that mistake countless time and keep scratching my head every time wondering what went wrong.
There is also a special tag for each. For Open Graph, the og:type defines which type of content you are representing (e.g. an article, website, etc.). You can find the complete list of valid types in the specification. We also have an og:url property here, which should contains the canonical URL to your content.
For Twitter, twitter:card defines how Twitter should render your social media card. There are four possible values here: either a summary card, a summary with large image card, an app card (with a link to download the mobile app), and a player card that can display a video, audio content, etc. You can find more about the different types of cards in the getting started guide.
How to add meta tags with Nuxt
If you’re using Nuxt with Nuxt content like me, it’s not possible to just add meta tags like this. However, Nuxt adds a few new fields that you can return from a Vue component, including a head field.
Assuming that your content would be available at this.$data.page and that you have a description field in the front matter of your pages, you can add these meta tags like this:
;
;
That’s it for the easy part! You now have a custom title and description when people post links to your content on social media. However, it’s missing a crucial element that will help make it stand out from the crowd: an image.
The hard part: adding an image
The hard part about adding an image is not adding the <meta> tag, but creating a nice-looking image. There are a few different options available to us:
- Use a third-party service that will generate images for us
- Create an API that will generate images on the flight
- Generate those images as part of the deployment pipeline
I decided to discard the first option as it added a dependency on a third-party service. While some looked interesting (like htmlcsstoimage.com), the pricing was a bit steep for a personal website if I needed to generate more than 50 images. While I’m prototyping, I might need to generate hundreds of images just to get the look and feel of those cards just right.
For the second options, it had a few drawbacks. This website is a simple static website hosted on AWS Amplify. There is no dynamic content at the moment, so adding an API just for social media cards seemed a bit overkill. This also meant I’d have to have a mechanism to ensure people don’t create fake image cards.
Generating the images
The only reasonable option left to me was to generate these pictures during the deployment with Amplify Console. I found this nice library that takes HTML and generates an image from it.
I wrote a small script that extracts the front matter from Nuxt content pages, creates predictable file names for each article and generate all the images. Since the library uses handlebars, it was easy to create a template I can reuse for all pictures. If you want to see what the script looks like, you can have a look at a sample one (a bit too long to include directly here) that will read front matter from Markdown files and generate images based on those.
Adding the image meta tags
Now that we have the images for all the articles, we can add the relevant meta tags. The hard part was creating the images, so adding the tags for images is as simple as adding the other tags.
<!-- Skipping the previous meta tags -->
<!-- For Open Graph -->
<!-- For Twitter -->
Testing

Social media cards can be fiddly and there are lots of room for mistake. Thankfully, there are a few tools that make it easy to test if your meta tags are set as expected. You can use a website like metatags.io and paste your page URL. It can show you how will it look like on a variety of platforms, including Google searches, Facebook and Twitter.